Search This Blog

Saturday, June 25, 2011

Spicy Carrot Cake With Ginger Cream Cheese Frosting

This will be my last blog for the next two weeks, sorry for the disappointment, but the boyfriend and I are going to LA for his birthday, we're staying in a hotel so there won't be much baking going on, but I do plan on making this cake for him at a friends house, carrot cake is his favorite!


This frosting is intensely delicious so prepare to indulge!

for the cake:
2 cups flour
2 tsp baking soda
1/4 tsp salt
2 tsp ground cinnamon
1 tsp ground nutmeg
1 tsp ground allspice
3/4 cup almond milk
1 tsp apple cider vinegar
3/4 cup vegetable oil
1 cup soy yogurt
1/2 cup apple butter
1 1/4 cup sugar
1 tbsp vanilla extract*
2 cups grated carrots
1 cup chopped nuts of preference (optional)
1/2 cup raisins (optional)

for the frosting:
1 package tofutti better than cream cheese
1/2 (4 tbsp) earth balance
3/4 powdered sugar
1 tbsp vanilla extract*
1 tbsp ground ginger

*I get a little crazy with vanilla extract in all of my recipes because I'm obsessed with it (I make my own), but average for both of these recipes would be 1 tsp, just in case you're not as enthusiastic as I am.

Preheat the oven to 350 degrees, grease and flour 2 round cake pans.

Whisk together the almond milk and apple cider vinegar and set aside to curdle. In a medium bowl combine your flour, baking soda, salt, and spices, I like to sift my flour because I like a cake with a tight crumb, but if you could care less about the "crumb" of your cake there's no need to sift it, set this aside. In a large bowl combine the almond milk vinegar mixture, soy yogurt, apple butter, sugar, vanilla, and oil, mix well with a wooden spoon. Slowly add the dry ingredients to the wet, mixing well after each addition, once all are combined and you have a smooth mixture add the carrots, nuts, and raisins (if using) and combine. Your batter should be smooth but thick depending on the moisture content of your soy yogurt you may have to add a tablespoon or 2 of extra flour, use your best judgement, if your cake is too moist it isn't the end of the world, it just might sink a little. Divide evenly between the 2 pans and bake for 18-20 minutes or until a toothpick inserted through the middle comes out clean. While the cake is baking start your frosting.
In the work bowl of a stand mixer add the cream cheese and butter and whip on medium-high speed for about 5 minutes (I did mine for 10 because I wanted really fluffy frosting) add the powdered sugar, vanilla, and ginger, and mix well. I did not do a very thick layer of frosting on my cakes, so if you like a lot of frosting double the recipe. Try your hardest not to just eat it all with a spoon.
Once your cakes are baked let them cool on a wire rack for at least an hour before removing them from the pans. Once they are cooled put them out on a work surface on very carefully with a sharp serrated knife cut off the rounded tops so you have to level pieces of cake to work with, then place them one onto a cake plate frost it, top it with the second piece and frost again.


Thursday, June 23, 2011

Baby Broccoli Pot Stickers

I really, really hate broccoli, I always have and then Lolo from veganyumyum posted this lovely recipe and I am now obsessed with baby broccoli, it's so delicious!


These pot stickers were really delicious, they kind of just came together because I didn't have many ingredients in my fridge. I also really wanted a reason to use my brand new bamboo steamer, bamboo steamers are amazing!

1 tsp sesame oil
2 cloves garlic
1/2 cup chopped mushrooms
1/2 cup chopped tomatoes
1/2 cup chopped baby broccoli (including stems)
1/2 tsp ground cumin
1/2 tsp ground coriander
1/4 tsp chili powder
1 tsp ground ginger
salt and pepper to taste
8-14 egg-less wonton wrapper (if you can't find these you can make your own, but it is a very laborious process)

If you're using a bamboo steamer fill a large pot with at least 4 inches of water and put it on high heat, I added 2 tablespoons of dried lemon grass to the water, one of the wonders of bamboo steamers is whatever you add to the water gets infused into your food, leave this pot of water to boil. In a large skillet heat your sesame oil over medium heat, chop and add the garlic, once the garlic becomes fragrant add the mushrooms. Cook the mushrooms, stirring regularly, until they start to darken in some places, add the tomatoes, broccoli, and all of your spices, and cook stirring regularly until all of your vegetables are softened remove from heat. The easiest way to assemble these is to have everything you need ready to go, so set up your work station, if you're frying these instead of steaming them start heating your pan also, have some water ready, if you're using a steamer put a piece of parchment paper down in your steamer, take a wonton wrapper and put about 1 tsp of filling into the wrapper it's easiest not to over-fill them.


Using your finger wet one edge of the pot sticker and then fold in half and press the edges together, you can crimp them if you like, it does help them stay together better.


Fit your steamer over the pot of boiling water and place the pot stickers into it, put the lid on and let them steam away. The beautiful thing about bamboo steamers is that you can't overcook you're food it just keeps getting more and more moist, so you can prepare any other components of your meal and the steamer will keep your food warm without burning it, they need to steam for at least 10 minutes, or until the wrappers are translucent.

Tuesday, June 21, 2011

taco night....

If you tell anyone you're making vegan tacos they look at you cross eyed...there are several different approaches that I've seen and I feel like mine is a little different. I'm also a little conceited, I am completely convinced that my vegan cooking far surpasses everyone elses haha, maybe not. I can't disclose the full recipe because it's my dads, but I can share my method.

Textured vegetable protein was one of my favorite vegan discoveries, it's so versatile I've made fake chicken nuggets, and fried "chicken" and hamburgers, and meatballs, and country gravy with "sauage" and anything I feel like making...it works beautifully for tacos.
Start boiling water, around 2 cups. Place 1 cup or more of the TVP into a bowl, add 1 tablespoon of ground flax seed, and 1 beef bouillon cube (if you can't find beef-free beef bouillon just don't worry about it). Once the water is boiling pour it over your TVP (textured vegetable protein) until it comes about half an inch above the mixture, set this aside. In a skillet heat 2 tablespoons of oil chop half of an onion and add it to the hot oil, while those start to cook crush a few cloves of garlic (I love garlic so I use about 4 cloves) add them to the oil, next add the TVP mixture. Brown your fake meat, this takes a while sometimes 20 minutes. Once your "meat" is browning add your seasonings, and then there you go! These have fooled even the pickiest of carnivores they are super delicious and the texture is perfect.

Wednesday, June 15, 2011

bittman's brownies

Have you heard of Mark Bittman? He wrote this amazing cookbook, I learned so many incredible things from this book, so many of his recipes are my "go to" recipes. Anyways, the other day me and the Boyfriend were sitting on the couch watching Grey's anatomy and he looked right over at me and said, "let's make something together, I want to bake." I was so thrilled, he is the perfect man. These brownies are simple and delicious, they have a decadent texture similar to mousse, and they have 6 ingredients. It doesn't get much better than this!
with a scoop of soy ice cream :)


So here is Bittman's brownie recipe, slightly modified to be animal free!

3 ounces unsweetened chocolate (I use baker's chocolate which is usually vegan)
8 tbsp earth balance or other butter substitute
1 cup sugar
1/2 cup flour
1/2 cup soy yogurt
1 tbsp vanilla extract (optional)

Preheat your oven to 350 degrees and grease a small baking dish. I don't own a double broiler, of all my fancy kitchen tools I never get around
to buying one of these, mostly because I've found a perfectly suitable substitute. In a small pan add 1-2 inches of water, place a heat resistant bowl, I use corelle because it's everything resistant, that is large enough to rest above the water and not touch it, and turn the burner on medium high, once your water is boiling add the chocolate and the butter. You could melt these in the microwave, but I really don't recommend it because both chocolate and butter substitutes scorch so easily. Once your butter and chocolate are melted transfer to a medium sized mixing bowl and whisk in your sugar, then whisk in the soy yogurt, followed by your flour and vanilla if your using it. Transfer to your prepared baking dish, bake 20-30 minutes, until the middle is barely set.


Tonight is taco night, I will be sure to take pictures and post the recipe!

Saturday, June 11, 2011

blueberry sunshine muffins

I love sunshine...people who know me well actually use as an adjective to describe me...there's always room for sunshine in a recipe. These little cuties are just in time for summer!

The boyfriend and I both work very early in the morning (like 4 am) at least 3 times a week and I've been wanting to come up with something easy to eat in the car and nutritious for us to start our day with, I did a lot of muffin research before I started these because a plain blueberry muffin would be boring! They turned out a little too moist to really be classified as a muffin but they are healthy enough to be breakfast.

3/4 cup oat flour*
1/2 cup flour
1/4 cup sugar
2 tablespoons ground flax seed
1/4 tsp salt
2 tsp baking powder
1 tsp lemon zest (optional)
1 ripe banana
1/4 cup oil
1/4 cup almond milk**
1 tbs orange juice
1 tbs vanilla extract
2 cups blueberries (this is a lot of blueberries feel free to use less)

Streusel Topping
2 tbs flour
2 tbs brown sugar***
2 tbs cold earth balance

* Instead of going out and buying oat flour just grind up some oatmeal, you can use a mortar and pestle like I do or use a blender or a food processor, basically anything will work oatmeal is on the fragile side.
**We've been using almond milk lately and enjoying it much more than soy milk, and using the soy free variety of earth balance, and my body has really seemed to appreciate less soy in my daily diet.
***I mix up my own brown sugar, just with turbinado and molasses. If you can find vegan brown sugar my hat is off to you but I never found a reliable source here in Vegas for vegan brown sugar or powdered sugar so I make my own and buy vegan turbinado sugar in bulk. Brown sugar really is just molasses and sugar, Martha Stewart told me so.

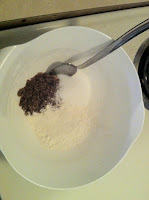
Make your streusel first, just mash it all together with your fingers.
Start with this,                                                              end with this!


Set your streusel aside, but not next to the oven or it will melt. Preheat your oven to 350 degrees and line a muffin pan. In the bowl of a standing mixer add the dry ingredients (flour, sugar, salt, baking powder, flax seed, and lemon zest) and mix until just combined. In a separate bowl mash your ripe banana and then add the wet ingredients (oil, almond milk, orange juice, vanilla extract) and whisk it into the mashed banana. Make a well in your dry ingredients and our the wet ingredients slowly in.
Mix on low speed until just combined, add the blueberries and gently fold them in by hand. If your using frozen blueberries toss them with 1/2 tsp flour before folding them into the batter, this will keep them from turning your batter blue. Divide the mixture evenly between your muffin pan (about 1/4 cup of batter per liner) then divide the streusel topping between the muffins, bake for 18-25 minutes or until a toothpick inserted all the way through comes out clean. I realize this a broad range for baking time, but it's hard for me to give an exact estimate because I have an old electric oven that gets really hot and burns everything, if you have a more reliable oven you'll probably have to bake them a little longer.

Monday, June 6, 2011

the vegan plight

So sometimes when you're a vegan you find some amazing recipe and you realize that in order to make that recipe you must also make each individual component of it. This isn't really that much of an obstacle, considering if it can be made then you most certainly are capable of making it, but it's annoying when you just want to be fat, lazy, and full of cupcakes, so maybe in the future you'll see a vegan version of these lovelies, including a recipe for home made vegan heath bars (my favorite candy bar) but for you now all of you non-vegans can make the original recipe and clog your arteries in the process :)
So I wanted to make red velvet cupcakes the other and I turned to my trusty VCTOW and while I was making them I decided to double the amount of coco powder and the amount of almond extract. Wow. They were so delicious. I won't repost the recipe because it wasn't my own, but anything by the genius Isa Chandra is delicious, I guarantee it. If you don't know about her she is the main pioneer behind vegan cuisine, she is the person that took vegan food from cardboard flavored vegetables to delicious culinary creations that even the fiercest chef would accept. She is a goddess, buy everything she writes! Anyways these cupcakes with my modifications and with a basic cream cheese frosting tasted just like Kahlua and cream and they looked beautiful too, I called them black velvet cupcakes. I will have a recipe for you darlings soon, this weekend I plan on trying madeleines again and making some blueberry muffins!
My Black Beauties

Saturday, June 4, 2011

sorry about the hiatus

I haven't blogged in what feels like forever, but I just worked 9 days in a row so I feel like that is an acceptable excuse...hopefully you can all forgive me. I attempted and failed at vegan madeleines normally people don't post their failures on the internet, but I had several lessons I learned and wanted to share and I feel like I know where I went wrong. I'm going to try again, but I ran out of flour, rookie mistake. I'm going to share my basic recipe and the changes I plan to make and hopefully I'll have some perfect madeleines that even the most pretentious frenchmen would accept. I used these three websites as a guide, not veganvegan goddess, and vegan stranger.

1 1/4 cup sifted flour
2 1/2 tablespoons ground flaxseed
1/4 cup hot water
2 tablespoons plain soy yogurt
1 cup sugar
6 tbs earth balance
2 teaspoons lemon zest
1 teaspoon vanilla extract
2 tablespoons almond milk

The first step is to brown the butter, browned butter lends a really pleasant nutty taste to anything you bake and the browned earth balance makes a big difference in the final color of these little guys so it's really worth the extra work. Place your butter into a small pan and turn the burner on low give it a few miniutes without stirring to melt completely, once it's all the way melted you can stir if it makes you feel better, but it doesn't make any differencee in the final product. Let your butter cook for about 15 minutes stirring occassioanally, you want to achieve a nice brown color, not burnt butter so watch it closely. This is what the halfway point looks like,
about 8 minutes after you see this it's done. Place a paper towel over a bowl large enough to hold the butter and pour the butter onto it, this seperates the solids that developed during browning, gently lift the paper towel and keep as many of the solids as you can on it, if you have a mesh sieve this process would be much easier. Set the butter aside to cool to room temperature.


Preheat your oven to 350 degrees, grease and flour your madeline pan grease it lightly and flour it generously then tap the excess of, everything I read says that a well floured pan helps with well defined ridges. Mix the flax seed and the hot water then add to the bowl of a stand mixer, add the yogurt and mix on high for about 4 minutes. This was one of my really exciting successes, if you bake a lot you know that when using eggs you often beat them to the "ribbon" stage and this has the effect of shaping your baked goods, well this yogurt flax mixture formed ribbons! I was ecstatic, my boyfriend didn't understand my joy but I'm sure you all will!

See that shiny ribbon of goop?! There are not any eggs in there!! While the mixer is running on medium speed everything except the flour and butter. Once everything is combined turn off your mixer and sift the flour right on top, using a rubber spatula fold the flour in, this will not be an easy task the batter will be pretty thick and lumpy but thats ok, once it is all incorporated add the butter and gently fold it in with your spatula. This took me a while, probably because 6 tbs is way too much butter for this recipe, but it was a learning experience! Once everything is mixed together and smooth fill your molds 3/4 of the way full, slide them into the oven and bake for 7 minutes and 350 then reduce the heat in your oven to 250 and bake another 8 minutes then turn your oven off and let them sit in there for 20 minutes, I know this seems ridiculous but it works! So my final result was more like lemon pound cake, too dense, too buttery, too sweet, and not very defined ridges, but they were tasty! So for my next try I'm going to cut the flour, butter, and sugar (yay! healthier!) and increase the water I mix with the flax, I'll let you all know how it goes!